Beginner's Guide to Reloading Equipment
By Damon Cali
Posted on August 30, 2013 at 12:33 PM
Hand loading your own ammunition is rewarding. You will usually save money on a cost per round basis, and in most cases it is the only way to wring the most accuracy out of your precision rifle. It also opens up the world of non-factory chamberings, which can also provide an edge in competition.
But where to start? There is so much equipment and so much to learn. Let's tackle the gear first. I've put together a guide on what I believe will help a beginner get started with a minimum of cost while still using quality gear. Most of this stuff lasts for decades, so it really is a false economy to try to save a few bucks in most cases. On the other hand, some things are worth paying for and some things aren't. So on to the list:
Must Haves
Reloading Manual
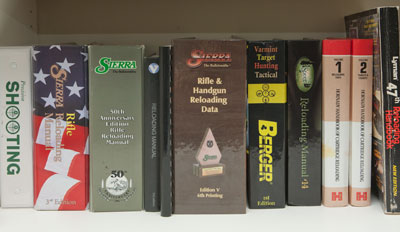
Reloading manuals serve two purposes. First, they cover the basics of the reloading process and give the reader a basic background in internal and external ballistics. Second, they tell you how much powder to put in the case without blowing up your rifle and seriously injuring yourself or others.
It is good practice to verify your charge weights with the manual every time you load. I take lots of notes on my hand loads, including charge weight. But still, each time, I verify that load is in the safe range by looking it up in the book. It only takes a minute, and prevents catastrophe brought about by mis-remembering or mistyping.
The reloading manuals are published by the manufacturers of reloading components and equipment. Keep that in mind. You won't find any data for Speer bullets in a Sierra loading manual, for example. So get the manual for the bullets you intend to use.
Unfortunately, not all manuals are equal when it comes to the instructional section. The best I have come across is the one from Lyman. For beginners, I recommend buying the Lyman book and the book written by the company who makes the bullets you want to use. Do that and read them before you buy anything else. If at all possible, find an experienced reloader to help you. Reloading is safe when done properly, but can be very dangerous if done incorrectly. You must know that you are doing things the right way.
Reloading Press

Before you settle on a press you have to decide which kind you want. There are three main categories to choose from: single stage presses, turret presses, and progressive presses.
A single stage press is a simple press that allows you to use one die and load one case at a time. You have to switch out the die between operations (seating and sizing require two separate dies). On the up side, this is the cheapest and simplest kind of press. On the down side, setup takes longer as you have to adjust your dies every time you change them and that takes a few minutes. You also have to manually place each case in the press one at a time. Your overall rate in rounds per hour will be the slowest with a single stage press, but the simplicity is a plus. My favorite is the RCBS Rock Chucker Supreme.
A turret press is just like a single stage press, except that instead of holding one die at time, it holds them all. Inserting and removing cases is still a manual operation like on a single stage press, but at least you don't have to readjust the dies as much. Another potential downside is that because the turret is a moving part on some models, there is less rigidity and potential for misalignment in the press. They are also more expensive than single stage presses. A good example of a turret press is the T-7 model from Redding.
Finally, there are progressive presses. These range from upgradable turret presses to fully automated semi-commercial machines like the Dillon 1050. Progressive presses take a long time to set up, and the more automatic they are, the more fiddly that setup gets. But once they are set, they are fast - you can load several times as many rounds per hour as you can with a single stage press. But beware - they are not cheap, and exercising fine control over the process is more difficult. I do not recommend a progressive for beginners, but there are plenty of folks who have managed to learn on a full progressive.
For a beginner, I recommend using a single stage press - even if you ultimately wind up with a progressive, you will still find uses for a good single stage press, and it's a lot simpler and cheaper to get started. I still use a single stage press for all my reloading. I never load more than 100-200 at a time, so my Dillon sits unused in a box in the basement. I may dust it off at some point if I get back into shooting pistols and need to load more than that, but for now, a single stage does all I need and want.
Measuring Equipment
You need some tools to measure small items with an accuracy of +/- 0.001". At the very least, that means you need a decent 6" caliper. The inexpensive models seem to be plenty accurate to do the job, but if you feel the need, you can spend a good deal more on a nice set from Mitutoyo or Starrett. They come in two varieties - dial calipers and digital calipers. Both work fine, but digital is a nice feature to have (but at the expense of having to deal with batteries and higher cost). They're easy to read, can switch between inches and millimeters, and usually have resettable zeros. You may also see vernier models out there. Stay away from those unless you enjoy squinting - they're very hard to read relative to the other choices and generally considered obsolete.
A good 1" micrometer is also a good thing to have, but not strictly necessary like the calipers. In this case, I do recommend a digital model in spite of the cost, because the alternative is a verier scale that gets very tiresome to read. I use the Mitutoyo digitals, but there are cheaper options that will do the job. Micrometers are useful for measuring case necks and other small dimensions that can require higher accuracy than a caliper is capable of.
Scale
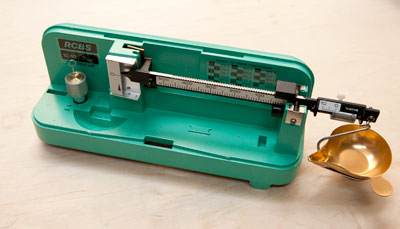
You need a scale to measure powder charges. There are balance beam types and digital models. Both work, but digital scales are a bit faster and easier on the eyes. It is not hard to find people who are dissatisfied with electronic scales, but I'm not one of them. I have a 20 year-old Dillon model that still works perfectly. Back then, everyone bitched about it, complaining that it drifted or was inaccurate. Now, everyone says the new models aren't worth at damn, but the old ones are good. Honestly, I don't know what they're talking about because mine has always been fine. Your milage may vary, but for my money, I'll go with a digital every time.
Powder Measure
A powder measure is just an adjustable device that allows you to quickly dispense powder in approximately equal charges. I say approximately because they work by volume, and we want our charges metered by weight. A powder measure will throw pretty consistent charges, especially with ball powders. But you may want to invest in a powder trickler for extruded powders. You throw a charge that is a few tenths of a grain light, and then trickle in the rest by hand to get the exact weight.
The big manufacturers make usable measures, and some can be upgraded with micrometer adjustment. In terms of performance, they're all more or less the same. I use an old RCBS model, but there are others that are just as good. There are also high-end models like the Harrell. The Harrell is very nice, well made, and a joy to behold, but it's no more accurate than the cheaper mass market models. A stand is a nice accessory to have, but you can also clamp your powder measure to your bench.
There is also the option of a powder measure/trickler/scale combo like the RCBS ChargeMaster. I've not used one, but I am very much tempted by the convenience and speed. You set the charge and push a button. The machine does the rest, and you get a perfectly weighed charge every time (in theory at least). They're not cheap, but the ChargeMaster seems to be the brand most recommended these days. (Update: I picked one of these up over the holidays. Look for a review in the spring/summer once I've had a chance to work with it a little.)
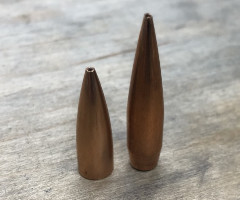
Dies
It goes without saying that you need dies for the caliber you want to reload. For pistols, I strongly encourage you to get carbide dies that eliminate the need to lubricate the cases. For rifles, it's a bit beyond this article to get into, as there are so many options available. You do not need bushing dies or micrometer adjustable dies, which get a little pricey. You may eventually want them, though. Bushing dies are most helpful when using turned necks, which is an advanced technique. The micrometer adjustable seaters are pure luxury - nice to have but not at all needed.
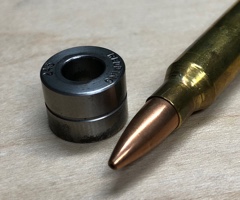
Shell Holder
You'll need a shell holder for your caliber that fits your press and the caliber you are loading. Not much more to say about that.
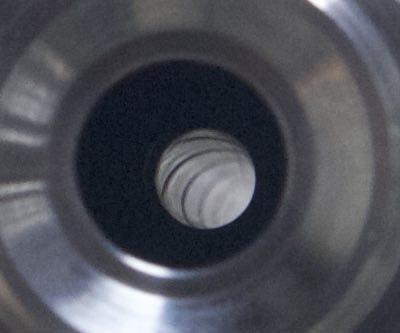
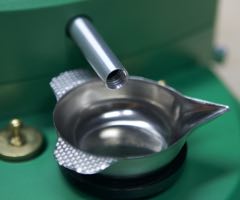
Powder Funnel
A simple powder funnel is needed to pour powder into the cases. You need one unless you'll be throwing charges straight into the cases. They're cheap funnels. Not much to say about them, except that if you're in a very dry climate, you may want a metal funnel to reduce static, which can cause light weight flake powders to cling and jump around.
Case Lube
Resizing cases requires that they be lubricated or they will get stuck in the dies. If that happens, you will cuss like a sailor and find yourself online looking for a stuck case remover. I use a mixture of 99.9% isopropyl alcohol and pure (anhydrous) lanolin. (12 oz of alcohol to 2 tablespoons of lanolin) - just spray it on and let it dry. I'm told this is basically what Dillon's spray lube is, and it looks the same, so you might give that a try. Other options include thicker greasy case lubes that you apply by rolling the cases across a foam pad, but I find those more trouble for no good reason. Imperial Die Wax is a popular product. Believe it or not, I have used Pam cooking spray in a pinch, although I'm not sure I'd recommend that as a general practice.
Case Trimmer
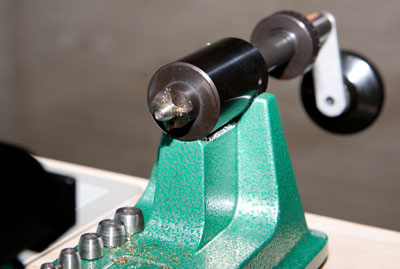
Safety dictates that you keep your brass shorter than your chamber. They will grow each time you fire or resize them, so you will need a case trimmer. The various hand turned models work in basically the same way. If you are doing a lot of loading on a progressive press or have arthritis, you may want to look into a powered trimmer, or one that gets it's own station on a progressive press. I don't have any experience with those, so I won't comment further. But for most shooters, a hand turned trimmer (possibly powered by a hand drill) will more than suffice. I use an old RCBS Trim Pro, but I sometimes wish it cut a little more cleanly - it tends to leave more of a burr than I think is necessary. That may be due to a dull cutter, but I may upgrade one of these days anyhow.
Deburring/Chamfering Tool
After you trim your cases, there will be a burr on the inside and outside corner of the case mouth. You will need to remove that or you'll wind up with problems. It seems like a minor thing, and it's tempting to skip this step, but you really do need to do it. There is an RCBS trimmer upgrade that combines the trimming, chamfering and deburring steps into one operation. If you use one of those, you do not need this tool.
Bullet/Case Gages
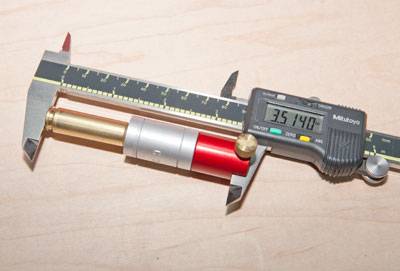
This may not technically be a "must have", but it's close enough in my book. In order to set up your sizing dies properly you must be able to accurately measure the case headspace dimension. To do that, you'll need a comparator of some sort. Hornady makes a nice flexible tool that you use with your calipers. It's flexible, and will cover all of your needs. The downside to the Hornady tool is that it takes a little effort to get consistent measurements, and it's an annoyance to have to attach it to your caliper.
RCBS makes a device called the Precision Mic. The downside to the Precision Mic is that you need one for each caliber, and they're not cheap. They also do not come in every caliber. But the worst part is that you can't be positive that zero means zero - you have to make a note of what tool was used to measure headspace and there is no guarantee that two Precision Mics will zero out the same. That may be nitpicky since you are usually concerned about relative measurements (that is, the difference before and after sizing), but it's something to note. The upside is that they are extremely easy to use and very consistent. I wish they would put a little more effort into the quality of these devices - I've had the graduated rings come loose, and the numbers are a little tough to read, but I still very much recommend them as long as you're aware of their shortcomings. Incidentally, the Precision Mic comes with a little bullet shaped thing designed to help set bullet seating depth. That bullet-thing is totally worthless. I'm not sure why they include them and don't know anyone who actually uses the device.
Similarly, you'll need to set your seating depth. You can measure the overall length of a cartridge with your calipers, but because hollow point bullets have a very inconsistent length due to the ragged tip, that's not the best way to do it. After all, the bullet tip never contacts the rifle lands - the side of the bullet does. A better way is to measure from the base of the case to a distance somewhere along the ogive. This is defined by a circular ring slightly smaller than the bullet caliber. For example, you might measure a .243 Winchester from a point defined by a .237 diameter circle on the bullet's ogive. The exact diameter doesn't really matter so long as you keep it the same when comparing measurements. This will prove to be much a more consistent length measurement. Both the RCBS Precision Mic and the Hornady bullet comparator (which is very similar to their headspace measuring tool, and available in a combined set) will do this for you.
I use the Hornady tools for most calibers, but have a Precision Mic for each caliber I load a lot of. Either one will do the job.
Really Want To Haves
Case Block
A case block is not technically a necessity, but they're cheap and may as well be. All a case block is is a block of wood, metal or plastic with holes in it designed to hold your cases upright. It helps keep you organized, and will speed you up. Get one or two. This one almost made the "must haves" section.
Check Weights
How do you know your scale is telling you the truth? You don't. Not unless you buy a set of check weights. Use these to verify your scale's accuracy for each reloading session. I've never experienced my scales being off by enough to be dangerous, but it's a quick, inexpensive way to get peace of mind and confidence in your hand loads. For extra confidence, verify your scale at a weight close to the charge you will be throwing. If I'm aiming for 39.0 grains of powder, I'll check my scale with two, 20 grain weights and make sure the scale reads 40.0 grains.
Priming Tool
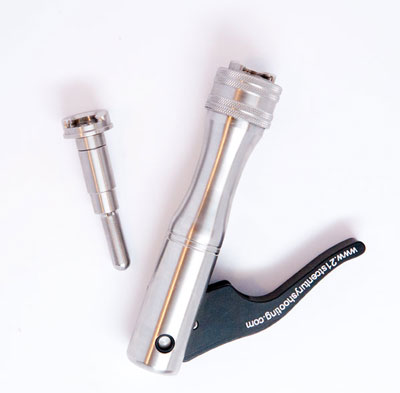
Most reloading presses come with a priming tool built in. They pretty much suck. They're slow, fiddly, and provide poor tactile feedback. What you will want is a dedicated priming tool, of which there are two basic types. One is a hand held model, and the other is bench mounted. The hand held models may or may not come with a built in primer tray that allows continuous feeding. The nicer models tend to not have these. Honestly, I'm not too impressed with the cheaper models - I've used the Lee Auto Prime and the RCBS hand priming tool. Neither is terribly impressive, but they get the job done. Sinclair makes a nicer version, but it is a single loading model - you have to manually pick up each primer and put it in place. I recently picked up a single loading hand priming tool from 21st Century shooting. It's very good, but not cheap.
There are also bench-mounted models that have tube-shaped magazines to feed primers. I haven't used a bench mounted model, but reports are that they are good - they allow adequate feel to seat primers and suitable speed. It should be mentioned that stacking primers in a metal tube is not the safest thing to do, and it requires care, as do all priming tools. A magazine of primers going off at the same time is not a good thing. Be safe and understand what you are doing at all times.
Primer Flip Tray
A primer flip tray is a small plastic tray about the size of a box of primers. You dump the primers into the tray, shake it around a little, and they all magically turn right side up. After 20 years of reloading, I still smile every time I see one of these work. A flip tray saves a lot of wasted effort when loading your priming tool. Do make sure you get one that fits the large Federal primer packages. If you use a hand priming tool with a tray, you don't need this because the loading trays double as flip trays.
As an aside, the link above seems to recommend using flip trays to store primers. This strikes me as a stupid idea and a solution to a non-problem. Primers are packaged the way they are for a reason, and removing them from those packages does nothing but concentrate them together and provide an opportunity for mislabeling. Use primer flip trays to flip primers, not to store them.
Nice to Haves
Tumbler and Media
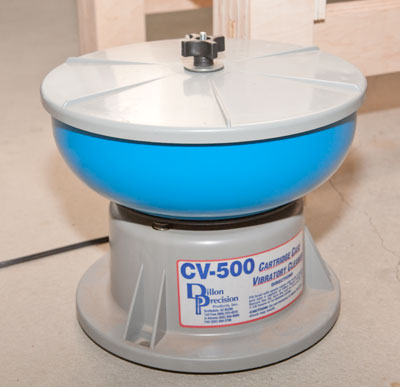
While not strictly necessary, you will probably at some point wind up with a vibratory tumbler and polishing media. Tumbling fired cases will clean off the powder residue and other crud you might find on your cases and get them ready to reload again. Most of the manufacturers make them, and they're all the same. The main feature to look for is capacity, as they come in different sizes. I prefer using walnut shell media, but corn cob is also available. Walnut seems to clean the cases a little better, but neither will return your cases to looking new, especially on the inside. But they will get your cases clean enough to inspect and remove any grit that you don't want in the chamber. Using treated media will add a little shine to your brass.
There are also some rabid advocates of stainless steel tumbling media which is used in a special rotary tumbler due to the weight of the media. Instead of ground up bits of walnut shells or corn cob, you use little stainless steel pins in a wet polishing solution. This is a more expensive option, but the cases come out blindingly clean and shiny - as if they were brand new again. Your cases do not need to be this clean, but look into stainless if sparkly ammunition is what you want. There is a certain intangible satisfaction that comes from having perfectly clean brass.
Similarly, there are advocates of ultrasonic brass cleaners that will do almost as good a job as stainless steel media. I don't have any experience with these, but know some folks who use them happily.
Bullet Puller
These hammer shaped devices are used to extract the bullet from a case without damaging either. This is in the "nice to have" category until you need it, at which point it becomes a ""must have". I have one, but only occasionally use it. If the idea of smacking a concrete floor with a hammer that contains a loaded round seems crazy, don't worry - this is how it is supposed to work and it's perfectly safe. If you find yourself needing to pull a lot of ammunition, a collet type puller is a good investment. Collet pullers fit in your press where they grip the bullet and use the press's leverage to extract the case without spilling powder, unlike kinetic pullers that make a little bit of a mess.
Decapping Dies
Sizing dies come with a decapping pin so that the spent primers get ejected when you size the case. Sometimes you will want to deprime the cases without sizing them (prior to cleaning, for example). In that case, a specialty decapping die comes in handy. I like the Sinclair model because it comes with the thin decapping pins that will work with benchrest cases that have smaller flash holes.
Stuck Case Remover
You'll only need a stuck case remover if you ignore my advice about case lube and try to size a case without it. With some luck and care you'll never need to buy one, but it's good to know they exist.
Go Slow
If there is something you think you want but isn't on this list, the chances are high that you do not need it to get started. Hold off on the advanced stuff like neck turning, annealing, bullet pointing, and progressive presses until you've gotten a solid grasp of the basics. There is a lot to understand, and the basic equipment will load very accurate ammunition if you master the fundamentals of reloading. When you need some of the more advanced equipment, you will know it. If you don't know why you need something, do yourself a favor and put off purchasing it until you do know. You'll save your self some money and enjoy yourself more.
It's also worth stating that there are more options for these items than the ones I covered or linked to. I discussed the products I like the best, and a few that look good but I have not yet had a chance to use. If I left out a particular manufacturer's product it was only because I am more comfortable recommending items I use myself, or at least have been exposed to in detail. I can honestly say that there isn't much out there that is just plain bad, but that in my experience you do tend to get what you pay for when it comes to reloading equipment.
Damon Cali is the creator of the Bison Ballistics website and a high power rifle shooter currently living in Nebraska.
The Bison Ballistics Email List
Sign up for occasional email updates.

Want to Support the Site?
If you enjoy the articles, downloads, and calculators on the Bison Ballistics website, you can help support it by using the links below when you shop for shooting gear. If you click one of these links before you buy, we get a small commission while you pay nothing extra. It's a simple way to show your support at no cost to you.


© 2011-2025 Bison Ballistics Munitions, LLC