An Introduction to Rifle Chambers
By Damon Cali
Posted on September 03, 2013 at 11:49 AM
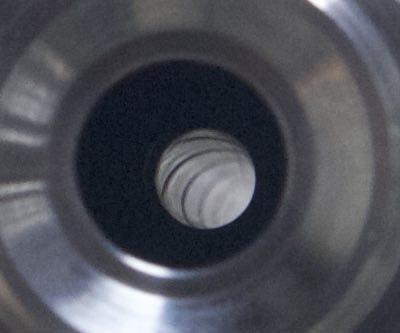
A close relative to the cartridge case, the chamber is an important feature of your rifle, as it has a significant impact on both safety and accuracy.
A typical bolt action rifle's barrel is just a one-piece, solid metal tube that gets threaded into the front of the action. The chamber is the hollowed out area at the back end of the barrel in which the cartridge sits. But before we discuss the various aspects of chambers, a note on safety. Using a custom chamber requires a solid knowledge of advanced reloading practices. It is very easy to craft ammunition that is unsafe. You must have a proper understanding of the concepts and practices before working with a custom chamber. This article will not give you all of that knowledge - it is just an overview that will start you on the path to full understanding. Be careful and seek help from your gunsmith and reamer maker if you have questions.

Cutting a Chamber
Barrels come from the factory with no chamber. It is the responsibility of the gunsmith to cut the chamber into the barrel with as much alignment and concentricity with the bore as possible. This helps ensure that the bullet starts its trip down the bore as straight as possible. A bullet that isn't straight in the bore will not hit it's target. The more crooked it is, the bigger the dispersion will be.
But this isn't an article about gunsmithing. There are many different ways to cut an accurate chamber, and frankly, I'm not qualified to discuss the ins and outs of various methods. We'll just note that a precisely machined chamber is a good thing, and leave the details to the smiths.
So it's good to have a precisely aligned chamber. But what else matters? The important things are headspace, neck diameter, and throat length.
Headspace
Headspace, in the context of a rimless rifle chamber, is the distance from a datum on the shoulder of the chamber to the bolt face. A datum is just an imaginary line or plane that is used as a baseline of measurement. For rimless cases, it's usually defined as a plane perpendicular to the axis of the case about half way up the shoulder. If you're interested in this sort of thing, check out the drawings at SAAMI for a more detailed explanation.
The important thing about headspace is that the chamber length needs to match up with the cartridge length. If the cartridge is too long, the bolt won't close, or even worse, you'll try force it closed and get a round stuck in the chamber - a potentially dangerous situation. If the loaded round is too short, on the other hand, the case will undergo excessive stretching when fired. At best, this means your brass will not last as long as it could. At worst, it means you'll experience case head separations and other bad things like inconsistent ignition and blown primers.
Hand loaders traditionally match their ammunition to the chamber with one of two methods: neck sizing or full length sizing.
Neck sizing is just that - only the neck of the case is resized during the reloading process. That leaves the body of the case just as it was after it was fired, which means the case should be a good match to the chamber. For a while, at least. After a few firings, the cases will start to be a tight fit, and will need to be full length sized. For this reason, I do not recommend neck sizing. It is just too easy for a case to slip through that is a hair too big. The first time you find yourself with a loaded round stuck so that the bolt can neither be opened nor closed without a mallet is the last time you will neck size. Worse yet, you'll break the bolt handle off with around partially chambered. You have been warned.
Full length sizing can be thought of as reducing the length of the body of the case. You're essentially "bumping" back the shoulder of the case by a few thousandths of an inch. Done properly, you can full length size your brass by just .001-.002", allowing for a good fit in the chamber without the worry of a stuck case. It is wise to bump the shoulder of a cartridge to be fired in a semi automatic rifle by .003-.005" to ensure proper function, but bolt guns can get away with .001" to .002".
One note on full length sizing - for the first firing or two, it can be difficult to get a consistent .001" bump. That's ok - and in my experience, things even out after that, and you can hit .001" consistently with no problem.
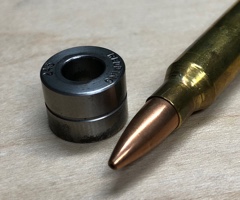
So how do you know how to set up your dies to make such small adjustments? You have to measure the case after it's fired. I like the Hornady headspace tool, but there are several others that will do the job. You use the Hornady tool with your calipers to measure the case headspace. Then you set up your dies by trial and error until the cases coming out of the dies are sized just a hair smaller than the cases going into the dies. You just screw the dies in a tiny bit, resize, and measure. Repeat this until your cases are sized the right amount. Measurement is key - don't try to do it by feel. Some people view this sort of measurement as optional or an advanced practice. I do not. Knowing that your brass is a proper fit in your chamber is fundamental to good reloading practice. Unfortunately, dies are are threaded too coarsely to easily make .001" adjustments. But keep at it and it can be done.
Neck Diameter
When a round is fired, the pressure from the propellant gases expand the case until hit hits the wall of the chamber. When the pressure drops back down, the brass will spring back a little bit. For example, I have a prone rifle with a chamber neck diameter of .273". Brass that comes out if it measures about .272". That .001" difference is the elastic spring in the brass.
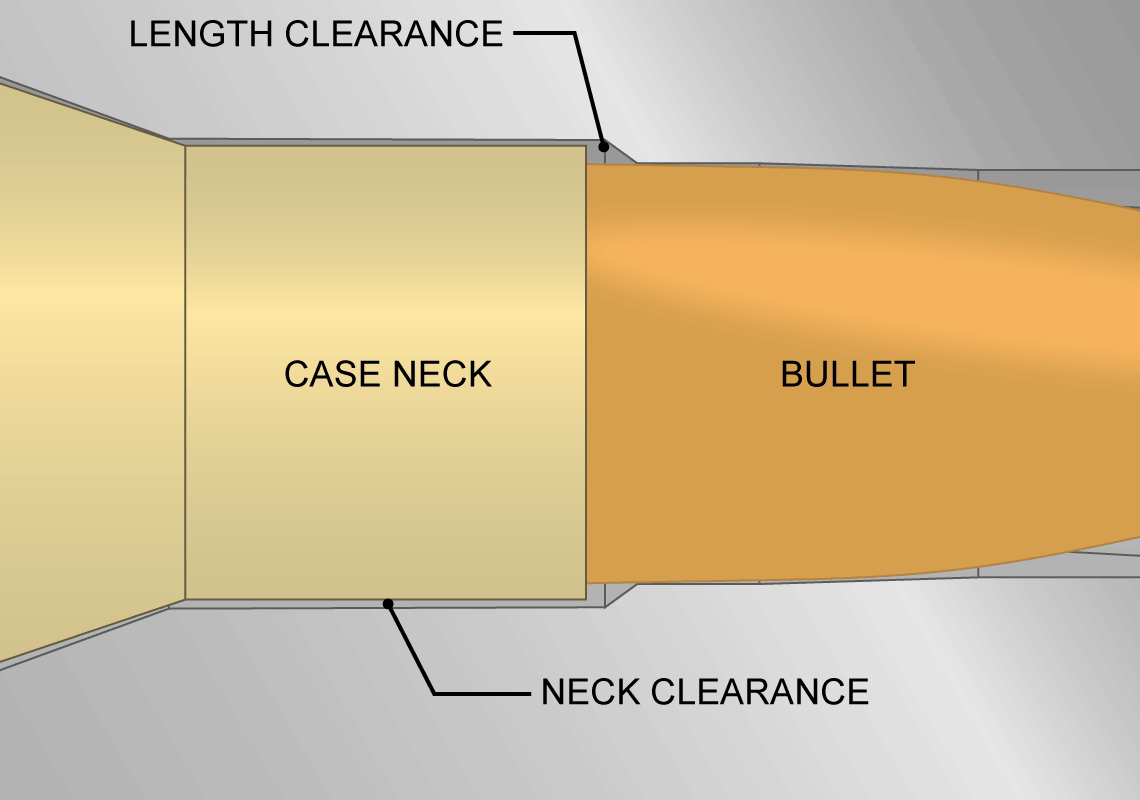
Most chambers (and all factory chambers) have a clearance between the neck and the chamber of several thousandths of an inch. My prone rifle (with the .273" neck), for example, uses loaded ammunition that measures .267". That's a diametrical clearance of .006", which is typical for a rifle of it's type, and is a little tighter than you will see in a factory rifle. Some benchresters have been known to run diametrical neck clearances of less than .001". I do not recommend that practice- it only takes a little bit of crud or a slight mistake to create an interference fit that can cause dangerous pressures.
So back to the spring back of the neck. If my prone rifle starts out with a .006" clearance and ends up with a .001" clearance, that means there is .005" of permanent deformation of the brass neck. That means stretching, working, and hardening of the neck. Eventually, that means split necks. The less permanent deformation, the longer the brass will last, although you can counter this effect with annealing. Benchrest brass, which is sized very precisely in custom dies and run with very tight clearances, can last for hundreds of firings. Factory chambered rounds might only last two or three firings.
So it comes down to a balance between the increased brass life (and some say accuracy) that come with tight neck clearances and the increased safety and reliability that come with looser fits. Ideally, I like to use .004" of clearance in a competition bolt gun, and would go down to .001-.002" for a benchrest rifle. It is important to note that in order to run tight clearances like this, you must turn necks. Even good brass will vary in neck thickness as it comes out of the box. If you don't believe me, check out some data on a batch of Norma 6mm XC - which is very good brass. For safety's sake, you simply must do this. If you don't want to turn brass, don't use a tight-necked chamber.
One final piece of advice. Buy your brass before you select a chamber reamer. Once you have brass in hand and turned, you will have a concrete baseline and can accurately select a neck diameter to get exactly the clearance you want. If you select the chamber first, you may be fine, or you might wind up with a little more clearance than you intended (you can always turn off more brass - you can't add it).
Throat
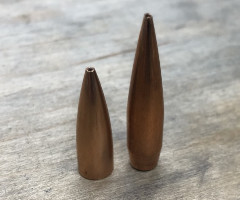
The throat of the chamber is the area just ahead of the neck. Also referred to as freebore, it is an unrifled section of the bore. Freebore gives the bullet somewhere to sit. With no freebore, you would be forced to seat bullets deeply into the case since the rifling would interfere with the bearing surface of the bullet. That's fine for very short bullets, but with longer bullets, you want to seat them out further to make room for powder in the case.
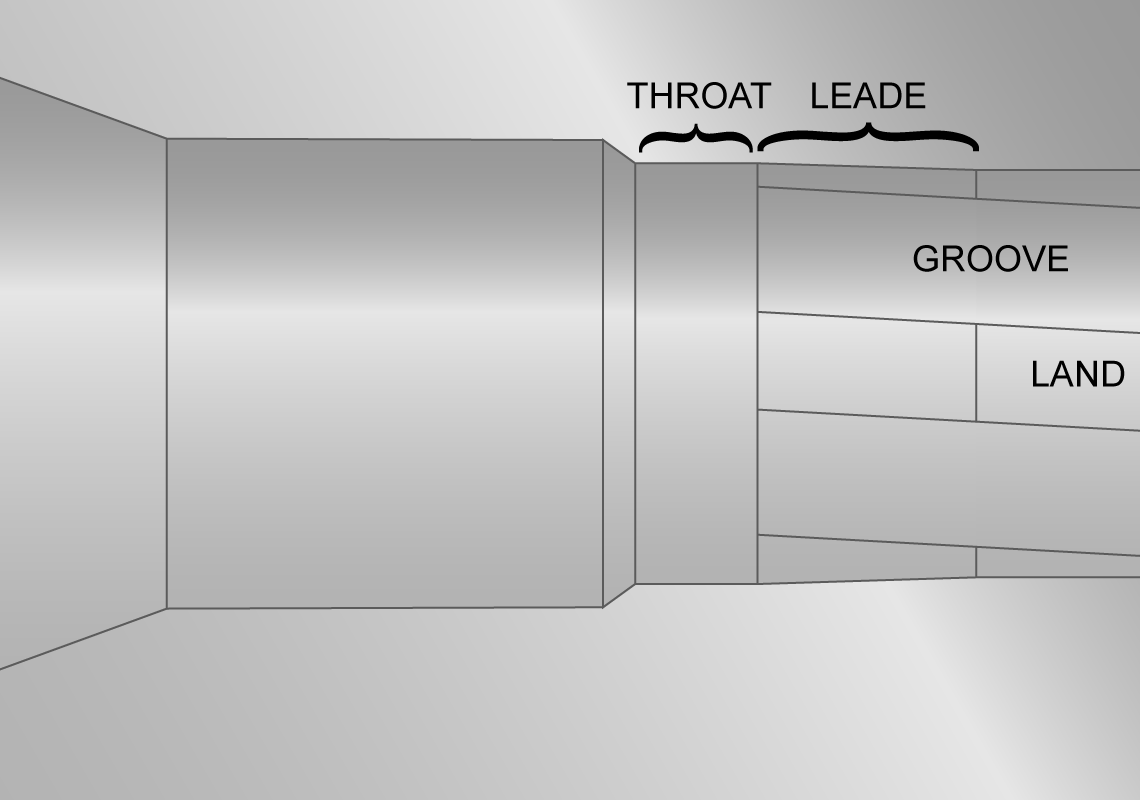
That's all there is to freebore. For optimal accuracy, you will want to select a freebore length based on the bullets you will be using. If you are building a long range rig, you'll be using heavy (long) bullets and will want to select a chamber with a long throat. If you're going to build a varmint rifle and want to use short, fast bullets, you'll want a short throat. Consult with your gunsmith and/or reamer manufacturer - 99% of the time, this has already been figured out. For the prone rifle I mentioned above, all I had to say was, "I want a 6mm XC chamber with a tight neck throated for the heavy bullets (107s)". That got me close enough to what I wanted that having a new reamer made was unnecessary. Don't over-think it.
Leade
There is a short section of the chamber in front of the throat where the rifling begins. Rather than have an abrupt step from freebore to fully rifled, there is a conical transition. This is known as the leade. You'll see a few standard angles for this - often it's 1.5 degrees. Honestly, I don't know how much this matters. The way I see it, this is the very first part of the barrel to erode, and the angle will be gone soon enough anyhow, so how much can it matter? I am more than willing to be proven wrong here, but I've never seen any evidence that the leade angle matters much for accuracy, and most shooters I know do not seem all that concerned about it.
All in all, your rifle's chamber is something that is important to understand. Knowledge of your chamber's dimensions and why they matter will help you load ammunition that is more accurate in your rifle, and it will make your brass last longer.
Damon Cali is the creator of the Bison Ballistics website and a high power rifle shooter currently living in Nebraska.
The Bison Ballistics Email List
Sign up for occasional email updates.

Want to Support the Site?
If you enjoy the articles, downloads, and calculators on the Bison Ballistics website, you can help support it by using the links below when you shop for shooting gear. If you click one of these links before you buy, we get a small commission while you pay nothing extra. It's a simple way to show your support at no cost to you.
