Sort-of Scientific Load Development for F Class
By Damon Cali
Posted on May 14, 2017 at 03:05 PM
Safety note: The loads discussed in this article have developed for my rifle, and they are safe in my rifle. My rifle and these loads are not SAAMI compliant, and if you use them in a rifle other than mine, you could have a very bad time or worse. The purpose of this article is to demonstrate the process of finding an accurate load, not to show you what load to use. I am assuming the reader is an advanced reloader, and has the appropriate knowledge and experience to load safely for his firearm. Put more bluntly: Do not use these loads in your rifle. Develop your own safely.
Load Development. Some people love it (I'm looking at you, benchrest shooters) and some people hate it.
For most of us who compete in one form of precision rifle shooting or another, it's a fact of life. And it's something people struggle with. Check out any internet reloading forum and you'll see endless requests for help. People are trying ladder tests, OCW (Optimal Charge Weight), OBT (Optimal Barrel Time), and a bunch of other methods. I don't do any of that for reasons I won't get into. But I do do something similar.
What I'm going to describe in this article is how I find a good load for a competition rifle. More specifically, I am talking about F Class. I also shoot service rifle, and to be honest, I don't even bother with load development for that discipline. The targets are big enough, and my skill level is low enough that I have more important things to worry about.
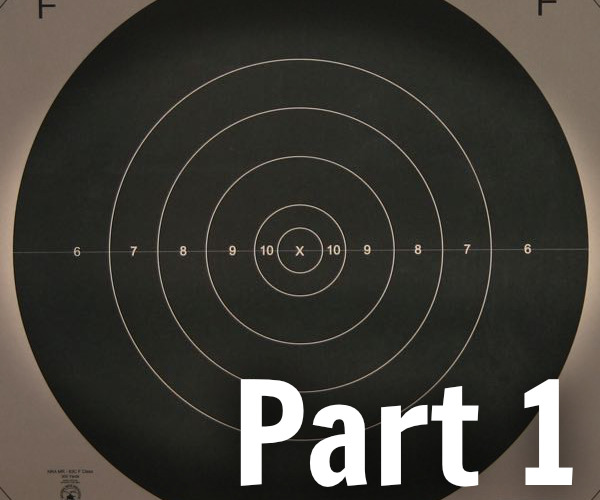
For F Class, I'm a skilled enough shooter that I will lose X's if not points due to a suboptimal load. The league matches at the Eastern Nebraska Gun Club have gotten competitive enough that a 1 MOA rifle isn't going to hack it. My goal is a rifle that will consistently hold the X ring (1/2 MOA) with a bit of margin to spare.
Theory
My load development method comes from experience more than theory. Not only would the topic of load development theory be several articles in its own right, it's a highly speculative topic. The reality is that this stuff is not well understood and my opinions on what I think might be going on aren't very helpful. That said, there are a few theoretical concepts that are helpful to keep in mind.
Barrel Time. We want the bullet to leave the barrel at the best possible time. Barrels whip about when fired, so you want the bullet leaving the muzzle at a benign point in that process.
In-bore tipping. If a bullet starts into the rifling straight, it has a better chance of staying that way. Bullets that tip are going to cause imbalance and generate accuracy-destroying aerodynamic jump.
Velocity. More is better for ballistics, but not always for group size. Sometimes our desire for accuracy is at odds with our desire for precision.
Pressure. Too much will ruin your brass or worse. Much of load development has to do with combusition optimization. QuickLOAD is your friend.
Bullet Quality. One of the most important factors in accuracy is the quality of the projectile. A poorly balanced bullet will never shoot well no matter how much effort is applied.
Research
Now, on to the practical stuff. The first step in load development is research. Find out what other shooters are using and why. There are far too many variables in load development to test them all, so we need a short cut. Other successful shooters are a great one. Look at what bullets, powder, brass, and primers they are using. Ask around for loads and expected velocities (always be sure to note the barrel length, and any special considerations like non-standard chambers).
The goal here is to hone in on a single bullet and powder. Cases are easy - use the highest quality brand you can find and prepare it as well as you care to. For F class ammunition, I have not found that primers are a critical component, and availability is spotty enough that I usually use whatever I have.
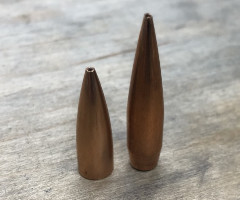
I will use an example of my F Class TR rifle for the rest of this article. From my research I settled on finding a load for 185 grain Berger Juggernauts over a charge of Varget. I have prepped some Lapua Palma brass and have a supply of CCI 400 primers. This combination seems to have served plenty of folks well when shooting a rifle similar to mine.
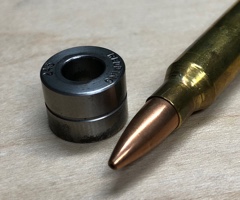
A brief session with QuickLOAD and some advice from other shooters pointed me towards a load in the 44 grain range, with bullets seated out as long as my chamber will tolerate. The lands of my rifle hit the bullet when the Cartridge Base To Ogive (CBTO) length is about 2.232" as measured by a Hornady tool.
Test Setup
Now that I've found approximately the load I need, it's time to hone in on the optimal powder charge and seating depth. Note that these are the only two variables I will test. It is not possible to test any more and come away with any confidence in the results. There might be a better combination out there that I miss, but as you'll see, the results speak for themselves. I'm confident I get close enough.
I load up 5 rounds for each load. Each load is a unique combination of powder charge and seating depth. The first day of testing I shoot groups ranging from 44.4 to 45.0 grains of powder in 0.2 grain increments. Each powder charge is tested at seating depths ranging from 2.280" to 2.320" (CBTO) in 0.010" increments. That would be 5 seating depths and 4 charge weights for a total of 100 rounds. However, I need a few rounds for fouling, so I left out the 44.4 grain - 2.280" test. I have a total of 19 different loads to shoot - one group of 5 shots each.
Shooting Groups
The next step is to go shoot some groups. Each combination got a single group, shot in no-wind conditions at 114 yards. I do not do load testing at longer ranges. I have never found a load that worked up close that did not also work at long range. I will concede that that is theoretically possible, but I have never seen it in real life.
A few tips on shooting groups for load development:
Wait for a day with good weather. Even at 100 yards, wind can play a significant role, and we want to eliminate that variable. If you can't get a windless day, use some good benchrest style wind flags, or at least some surveyor tape tied to a pole.
Do not shoot round-robin style. Every time you break your position to change your aim point, you risk disturbing your Natural Point of Aim (NPA). This can wreak havoc with your groups and you won't even notice.
Use Sinclair practice benchrest targets. These targets are printed on high quality card stock, and have 20 small targets on one sheet. They're a great value and convenience.
Watch the barrel heat. A 20 round F class string will heat up a barrel pretty quickly. Shooting 100 rounds without a break can make it scorching hot. Velocity and rifle dynamics will change slightly with large barrel temperature swings, so go slow and keep the heat down to a level that you'll see during match.
Note the range accurately. At my home range, the "100 yard" targets are actually at 114 yards. When converting from group size to MOA, that means that the MOA value will be about 80% of the measured group size. As long as the range is roughly 100 yards, you're fine, but do note it exactly so you can make apples to apples comparisons.
Do not pay attention to which load is being shot. I label mine A-Z and don't even look at that those letters mean. You don't want to influence your shooting based on what you expect to work best. Shoot them blindly and try your best the whole time.
Shoot off a stable platform. Preferably, that means a concrete bench, prone, or from another very stable position. We don't want to test you. We want to test the ammunition.
Keep All Data. Don't throw out flyers. This is wishful thinking. Unless you sneezed as you pulled the trigger, it counts.
Analysis
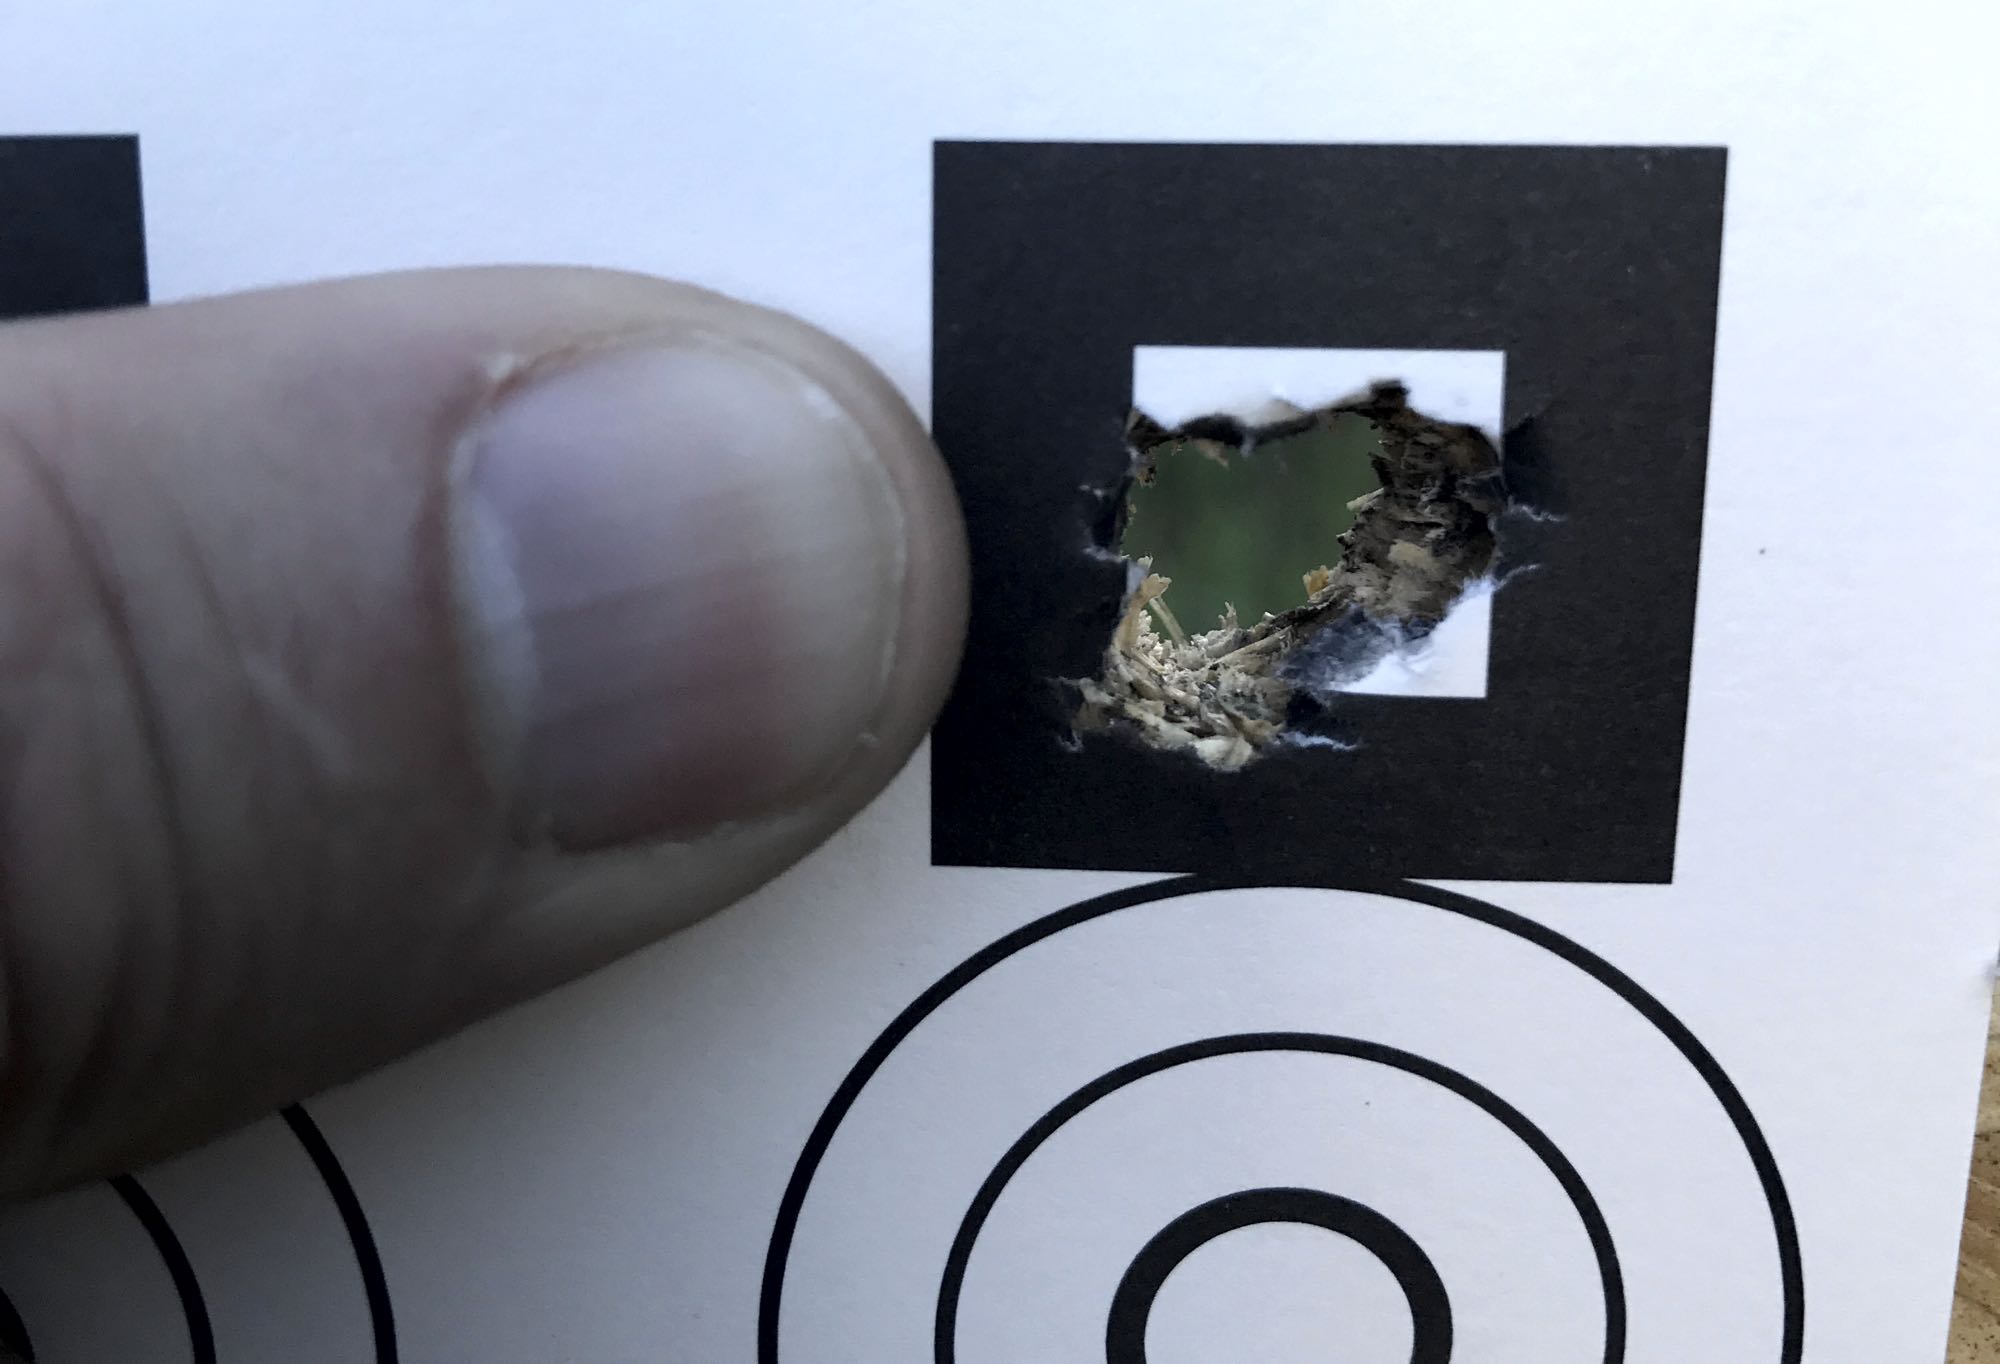
Now comes the sciency part. Once I get my targets home, I measure every group with calipers and convert them to MOA. When measuring groups, make sure you measure the black smudge that the bullet leaves on the paper and subtract that from your edge to edge measurement. That way, you will get an accurate center-to-center (or extreme spread) measurement. Don't just assume the holes are .308". They're not.
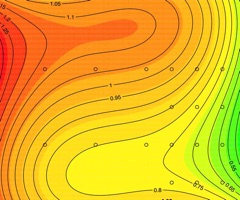
Once I have the group measurements, I make a contour plot of charge weight vs seating depth. Unfortunately, this step is sort of a pain. I use a short script I wrote using the R programming language. There are probably some easier alternatives, but R is free and I knew how to use it. If anyone knows of a more straightforward way to do this, please let me know, and I'll include a link here.
The contour plot is a 3rd order (cubic) polynomial surface fit to the data. It's like a three dimensional version of a "trend line" in Excel. Experience has shown me that a 3rd order surface is the most sensible. Lower than that, and you lose the fidelity you need to hone in on a load. If you go higher than that, you wind up over-fitting the data, and misleading yourself.
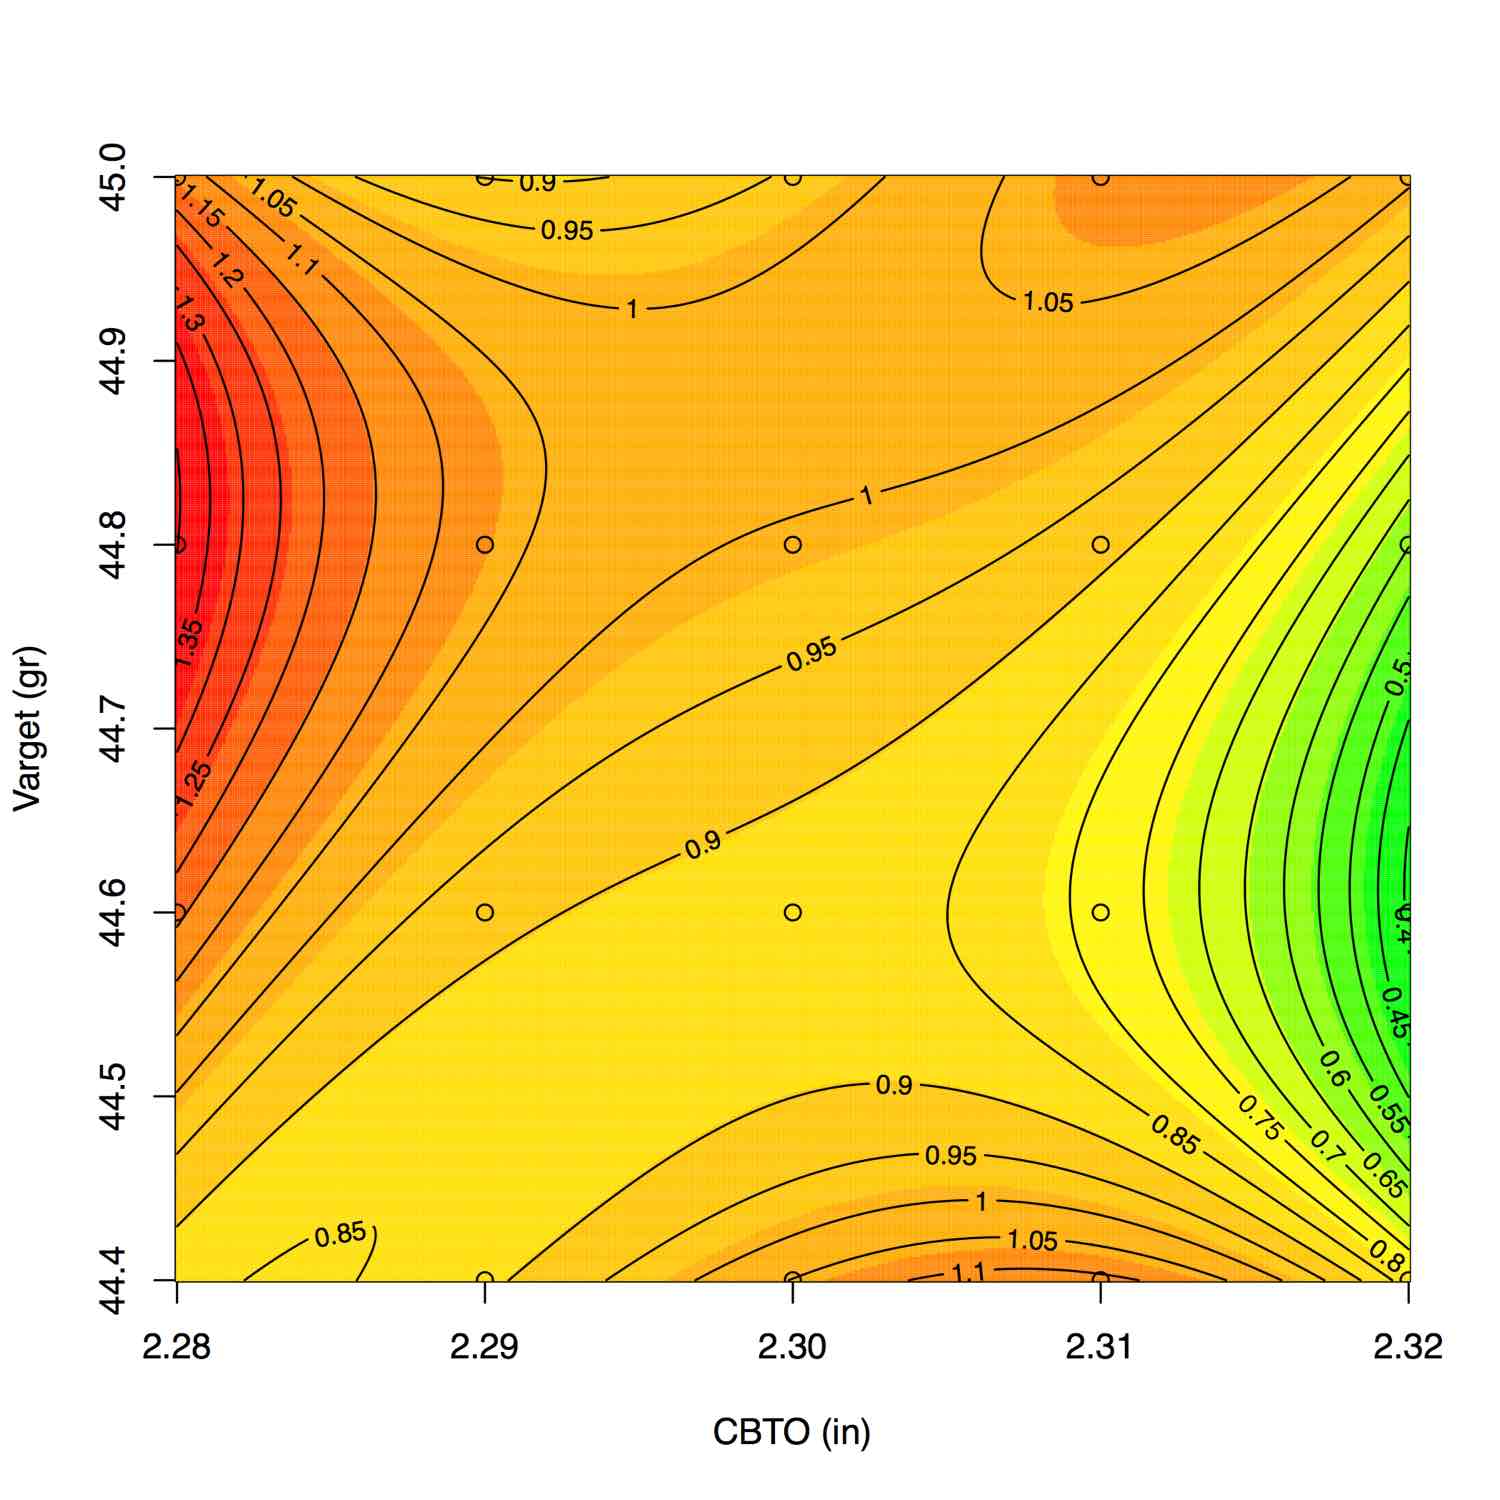
So let's take a look at what this says. The contour lines are lines of constant group size, and they're labeled. The little circles are individual groups. Red is bad, green is good.
The first thing to note is that group size seems to decrease with increasing cartridge length (decreasing jump). Charge weigh seems to achieve a minimum group size at roughly 44.6 grains. More or less powder increases group size.
All but one of these groups are big enough that I would call them unacceptable for this rifle. It's a high end rifle built on a Barnard action with a Bartlein barrel. Groups just under 1 MOA are disappointing. There was even one group around 2MOA. Ouch.
Finally, none of these groups touch the lands. I have a bit of an aversion to jamming bullets because you can get one stuck when you try to unload an unfired round, and dump powder all over the inside of your action. But what this data tells me is that this rifle's sweet spot is somewhere in the neighborhood of 44.6 grains of Varget, seated about 0.003" off the lands.
Still, I produced one single 5 shot group that was any good out of this whole batch. I'm not going to trust that at my next match. Time for another round of testing.
Round Two
The next week, I repeated the same procedure, but tested load combinations around the green area of the first round contour plot.
The results of the two rounds of testing, combined into one contour plot (see the raw data at the bottom of the page):

The new plot shows a lot of promise. It shows the same general trends as the first day's data, but with more data in the area of interest. I now have a lot more confidence in what makes this rifle shoot very well.
The load at 44.7 grains of Varget, jammed 7 thousandths into the lands shoots very well - about 0.4 MOA. This hits my precision goals for F Class competition. Just as importantly, deviations from this load by a few thousandths in length or a tenth of a grain in charge also shoot very well. That's good news because I can churn these out without obsessive levels of attention paid to consistency.
A few more test groups, and I've confirmed have a decent shooter. The very next 5-shot group shot out of this rifle was 0.28 MOA. That will do.
Criticism
This method works, but it can be improved. My main problem is that while it is comprehensive, it is not very efficient. Including fouling shots, it took 185 rounds of ammunition and two trips to the range to get my results.
You could reduce the round count by narrowing your test range, but you risk missing the best load. Or you might find that you need a second or third day of testing, when the best load seems to be on the edge of your test range. This happened in the above example.
You could also shoot fewer rounds per group, but then you degrade confidence in your results. If I were a better statistician, I would tell you how much. (If you are a stat guy, please chime in. How well would this work with 3 or 4 shot groups? Email me.)
If you can load at the range, that also helps. You can throw out obviously bad areas of the contour plot and redirect rounds to more promising regions. I don't need to test anything anywhere near that dreadful 1.7 MOA group I shot, for example. The downside to this is that it requires violating my "don't pay attention to what you're shooting" rule.
I am also fixing a lot of variables. I don't test different primers, different powders, or even different bullets. I am relying on conventional wisdom to get us approximately in the right spot. I'm not likely to discover any thing new this way.
All that said, this process works for me, and it gives me a great deal of confidence in my ammunition on match day. That confidence alone is worth something.
Raw Data
| Load | Charge | CBTO | ES Inches | ES MOA |
|---|---|---|---|---|
| A | 45.0 | 2.320 | 1.026 | 0.859 |
| B | 44.8 | 2.320 | 0.881 | 0.738 |
| C | 44.6 | 2.320 | 0.403 | 0.338 |
| D | 44.4 | 2.320 | 1.114 | 0.933 |
| E | 45.0 | 2.310 | 1.600 | 1.340 |
| F | 44.8 | 2.310 | 0.769 | 0.644 |
| G | 44.6 | 2.310 | 1.071 | 0.897 |
| H | 44.4 | 2.310 | 1.012 | 0.848 |
| I | 45.0 | 2.300 | 1.153 | 0.966 |
| J | 44.8 | 2.300 | 1.505 | 1.261 |
| K | 44.6 | 2.300 | 0.842 | 0.705 |
| L | 44.4 | 2.300 | 1.420 | 1.189 |
| M | 45.0 | 2.290 | 0.917 | 0.768 |
| N | 44.8 | 2.290 | 0.765 | 0.641 |
| O | 44.6 | 2.290 | 1.555 | 1.303 |
| P | 44.4 | 2.290 | 1.080 | 0.905 |
| Q | 45.0 | 2.280 | 1.384 | 1.159 |
| R | 44.8 | 2.280 | 2.03 | 1.700 |
| S | 44.6 | 2.280 | 1.062 | 0.890 |
| AA | 44.8 | 2.330 | 0.422 | 0.353 |
| BB | 44.7 | 2.330 | 0.479 | 0.401 |
| CC | 44.6 | 2.330 | 1.086 | 0.910 |
| DD | 44.5 | 2.330 | 0.499 | 0.418 |
| EE | 44.8 | 2.325 | 0.895 | 0.750 |
| FF | 44.7 | 2.325 | 0.518 | 0.434 |
| GG | 44.6 | 2.325 | 0.567 | 0.475 |
| HH | 44.5 | 2.325 | 0.967 | 0.810 |
| II | 44.8 | 2.320 | 0.807 | 0.676 |
| JJ | 44.7 | 2.320 | 1.595 | 1.336 |
| KK | 44.6 | 2.320 | 0.673 | 0.564 |
| LL | 44.5 | 2.320 | 0.867 | 0.726 |
| MM | 44.8 | 2.315 | 1.957 | 1.639 |
| NN | 44.7 | 2.315 | 1.134 | 0.950 |
| OO | 44.6 | 2.315 | 0.471 | 0.395 |
| PP | 44.5 | 2.315 | 0.983 | 0.823 |
Damon Cali is the creator of the Bison Ballistics website and a high power rifle shooter currently living in Nebraska.
The Bison Ballistics Email List
Sign up for occasional email updates.

Want to Support the Site?
If you enjoy the articles, downloads, and calculators on the Bison Ballistics website, you can help support it by using the links below when you shop for shooting gear. If you click one of these links before you buy, we get a small commission while you pay nothing extra. It's a simple way to show your support at no cost to you.


© 2011-2025 Bison Ballistics Munitions, LLC